Our suggestion for the renovation of a hall using LED light
|
The instructions are intended to serve merely as a guide. It does not matter which LED panels or LED strips you want to use. Just let your taste and creativity inspire you. Enjoy the high quality LED technology with its long lifespan. Please find our fantastic LED product range in our LED online shop. For further questions, quotes, advice and support please contact us via email on info@highlight-led.de. |
Wiring and structure
|
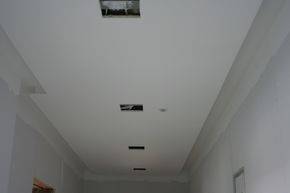
Next step
|
Next step
|
Result
|
|
In our online shop
we offer a wide range of LED panels in various sizes and colors as well as square and round. Furthermore find there different LED strips.
You can also use instead of the LED strips LED rails - depending on what you like best. |
| back to help center |


 In the following example an attic has been completely redesigned and expanded. A special highlight was to include LED lighting, which turns on when entering the hall way. We used flexible
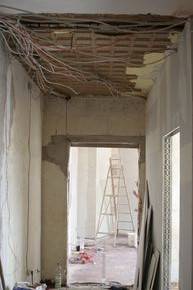
 Depending
on what degree your project is, you might have to start
with the dry construction. Once you have put plasterboard on the desired walls, you can lay cables for your
design of the corridor ceiling lighting. After this step has been completed
successfully, you can start with the lowering of the ceiling.
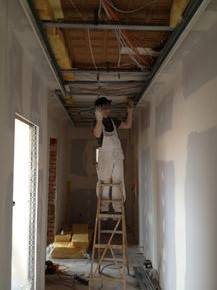
Depending
on what degree your project is, you might have to start
with the dry construction. Once you have put plasterboard on the desired walls, you can lay cables for your
design of the corridor ceiling lighting. After this step has been completed
successfully, you can start with the lowering of the ceiling. 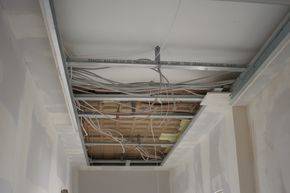
 If
you have completed the substructure of the ceiling, you can now start
with the paneling. Please ensure that you at this stage cut out the
according gaps, where the LED panels and the motion detector come
(please refer to the technical details). Through this hole the cables
will be drawn. If there is already a backup for the fuse dissipation
available, than the power supply must be ensured. At this point the cables
can be fixed with
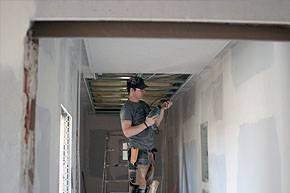
If
you have completed the substructure of the ceiling, you can now start
with the paneling. Please ensure that you at this stage cut out the
according gaps, where the LED panels and the motion detector come
(please refer to the technical details). Through this hole the cables
will be drawn. If there is already a backup for the fuse dissipation
available, than the power supply must be ensured. At this point the cables
can be fixed with 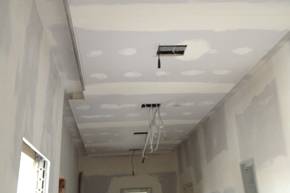
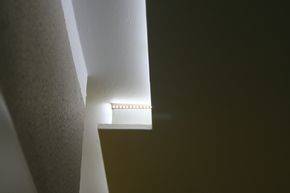
 After you have filled and primed the plasterboard, the
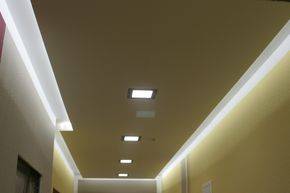
 To
secure most panels and motion detectors a bracket clip system is
provided. To install push the brackets together with the help of
springs and insert it into the open gap. Pay particular attention to
the correct alignment of the panels.
To
secure most panels and motion detectors a bracket clip system is
provided. To install push the brackets together with the help of
springs and insert it into the open gap. Pay particular attention to
the correct alignment of the panels. 


Copyright © World Trading Net GmbH & Co. KG